In this article, I explain how to set up Wisenet mobile and add your IP cameras.
If you have Wisenet cameras, this may be interested you. Keep reading.
You can use the Wisenet mobile app to display your camera live and playback the recorded footage. The process is straightforward and takes less than 5 minutes.
The Wisenet Mobile App Features
The Wisenet mobile app is designed to access your cameras remotely, no matter where you are located. It's possible to use it in a local network or via the Internet.
You can install this app on your Android or iPhone smartphone.
Here's a list of the App features:
- Works with 4K resolution cameras at 30FPS;
- Overview, Quad View and Panorama View;
- (PiP) Picture in Picture;
- Add camera via IP, DDNS, URL and UID code;
- Live View Mode;
- Playback Mode.
Download and install the App
To use the Wisenet app, visit the Android or Apple Store and look for the Wisenet App and click install, as shown in the picture below.

Just click the install button and follow the setup wizard.
And you are done with the installation, move to the next step (set up).
How to add a camera to the Wisenet mobile App
Here's the step-by-step to add a camera to the Wisenet mobile App.
- Open the App and click the (+) button;
- Click the icon on the right side to select the installation;
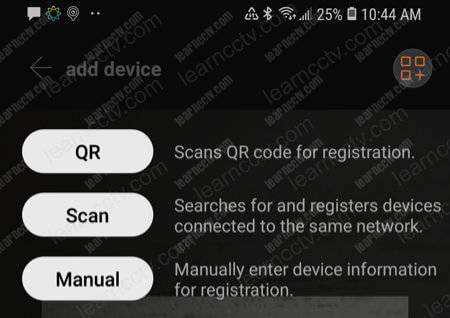
- Select the installation type, QR Code, Scan, or Manual;
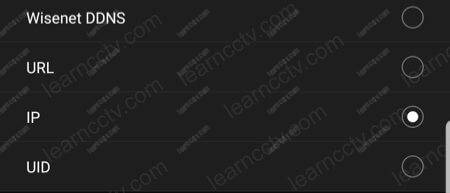
- Chose the type of connection, DDNS, URL, IP or UID;
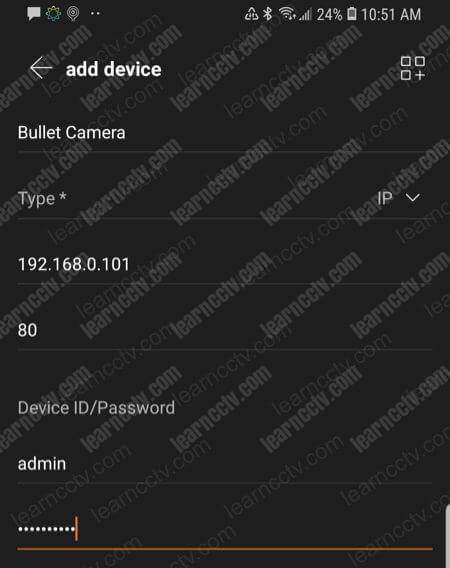
- Enter the camera information;
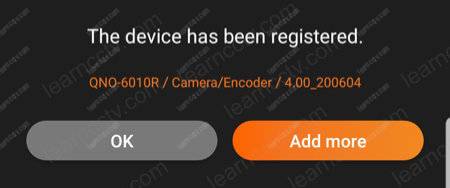
- Click OK to confirm.
The following pictures show the setup details.
Use the plus (+) button on the rigth side to add a new camera.

There's a button to allow you to select the type of installation.

You can choose "Manual Installation" for professional Wisenet (Hanwha Techwin) cameras or use the QR code for the new models and consumer cameras.
The Wisenet app allows you to add cameras using the Wisenet DDNS, a URL previously created for the camera, the local or remote IP, or a UID.
Select the mode you want to continue to the next step.
Enter the camera information and credentials to add the device.
You may see a confirmation as shown in the picture below.
How to view the camera on the mobile App
Once the IP camera is added to the mobile App you will see a device list,
Click the camera to watch the camera live.
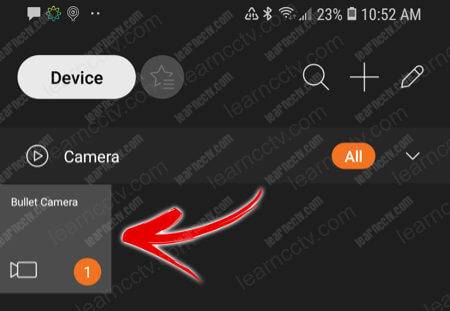
And it's done. Now you have your Wisenet camera online.
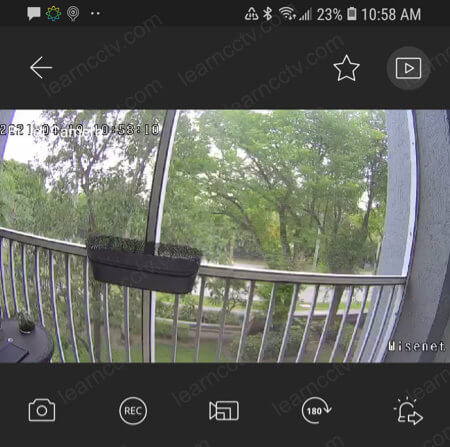
Enjoy your camera and explore the App features.
Relate Articles
You can also learn more in the Hawnha website.
Now you know how to set up Wisenet mobile, please share this article with your friends to spread the information and help them out.