A handful of Dahua IP cameras can record audio. This article teaches how to enable audio recording on Dahua cameras or recorders (DVR/NVR).
These Dahua cameras can record through their built-in microphone that picks up audio from their surroundings. This is great for users who do not want to run an external microphone separately.
Nevertheless, these audios are usually disabled in the camera’s settings by default. Therefore, you will need to enable the microphone and then configure the settings adequately.
There are two methods you can take to enable the audio. You can go through the camera’s web interface or use the recorder’s interface instead. It is up to you whether you want to use the camera or the DVR/NVR to enable audio recording on Dahua.
However, it is recommended to go through the audio enabling process via the recorder. If the camera you use is standalone, then you should go through the camera’s interface.
Enable audio recording on Dahua
Below you will find two guides, one that will use the recorder interface and the other that will go through the camera’s web interface.
How to enable audio recording on Dahua camera via DVR/NVR
First, open your recorder’s interface and enter your credentials. Once logged in, right-click on your mouse and select the “Main Menu,” followed by “Camera.”
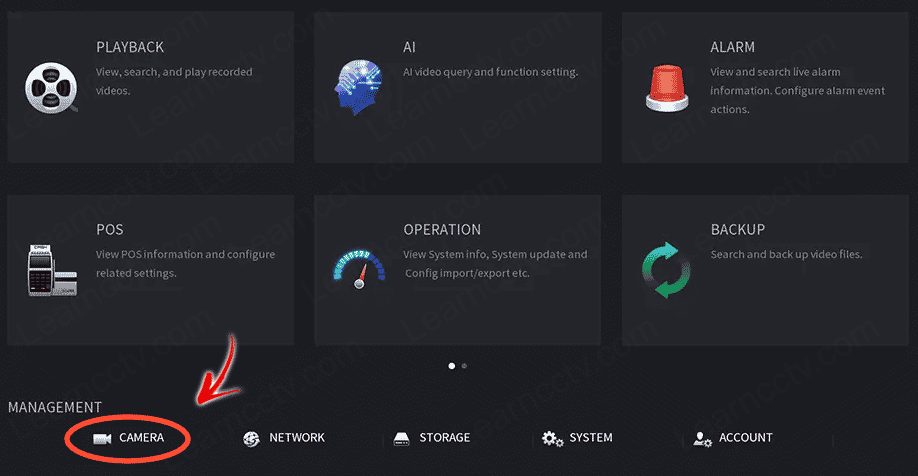
Choose the channel that you want to enable audio recording on. And select “Encode” followed by “More Settings.”

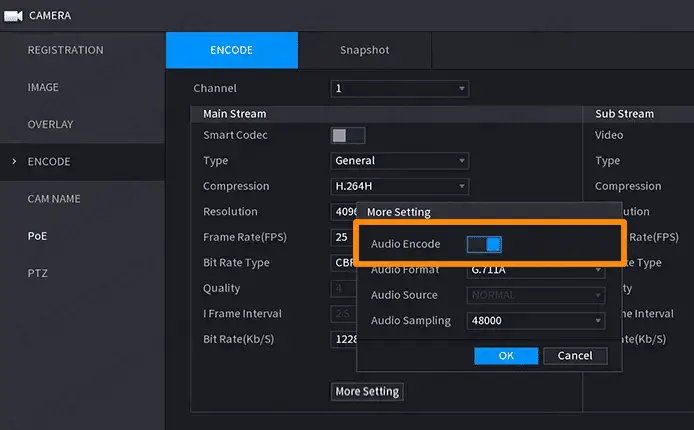
The next screen will present you with an option to enable audio recording on Dahua camera, so enable the “Audio Encode” option. Then click on “OK” and “Apply” to save the settings.
The “Audio Source” should be left on default for built-in microphones. However, if the Dahua camera has an external microphone, change the settings to “Line-In,” and the “Audio Format” should be set to ” G.711A.”
In addition, if you are using multiple channels that contain microphones, these settings will NOT apply to all cameras. You will need to return to the “Camera” section, select another channel, and follow the instructions again.
Do this for every Dahua camera with microphones to make sure that you enable audio recordings on all of them one by one.
How to enable audio recording on Dahua camera via the camera web interface
To enable audio recording on Dahua cameras through the interface, log into the camera’s web interface using your username and password.
If any prompts appear regarding plugins, install them prior to continuing. Then enter “Setting,” then “Camera,” and finally select “Audio.” If you need to learn how to uninstall the Dahua security camera web plugin, check out the article!
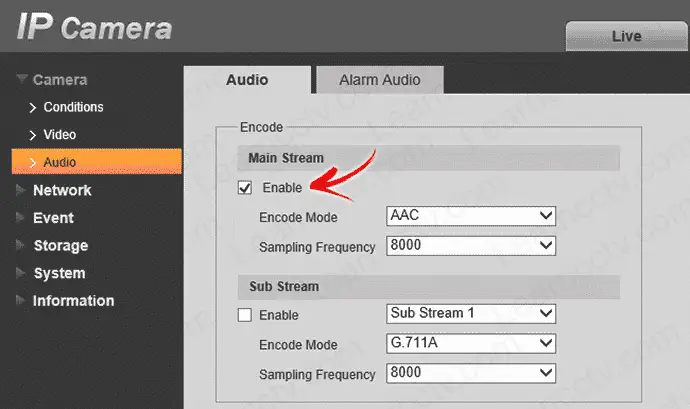
Under “Main Stream,” you should enable the tickbox to enable audio recording on Dahua Main Stream. Main Steam is the high-quality recording setting that is usually used in cameras.
You might want to enable the tickbox under Sub Stream as well; however, it is lower-quality and primarily used for live viewing through your phone via an app. Thus, the Sub Stream does not record and is used only for live viewing remotely.
In the settings, you will need to set up the correct “AudioIn Type.” Select Line-In for microphones that are external to the camera and instead are wired in. Or choose Mic for microphones that are built into your Dahua camera.
These settings should be chosen based on the camera model you have. Once done, click on “Save” to apply settings.
The “Sampling Frequency” and “Encode Mode” should be left in their default settings. However, some users claim that the playback volume can be relatively low, so you can adjust the microphone’s volume in these settings.
Additionally, you can also use Speaker Volume only if there is a speaker connected to your Dahua camera. Nevertheless, the default settings can be left, and the microphone should work just fine.
Final Thoughts
Now you know how to enable audio recording on Dahua, whether via the camera’s interface or the recorder’s. If in the footage you are not happy with the performance of the audio, you can revert to the audio settings and tweak them as needed.
Lastly, after tweaking the settings, check the playback to ensure the audio is working on all channels.