This article is about an IP camera setup for dummies.
If you want to learn how to set up your security cameras just keep reading...

Don't worry, the process is simple and you don't need to be an expert.
When I say the setup is for dummies, I mean I'll teach you in such a simple way that your camera will be up and running in less than 15 minutes.
Let's get started.
The IP camera setup diagram
Here's a basic diagram to help you understand how the IP camera is connected.
It's important to take a look and see what are the elements in the network.

This diagram shows all the devices with their respective IP addresses.
Just in case you don't know, an IP address is how the devices are identified in the local network it's a unique number just like your license driver or ID.
In the example, I'm using the IP range 192.168.2.x but yours could be different.
The IP camera physical connection
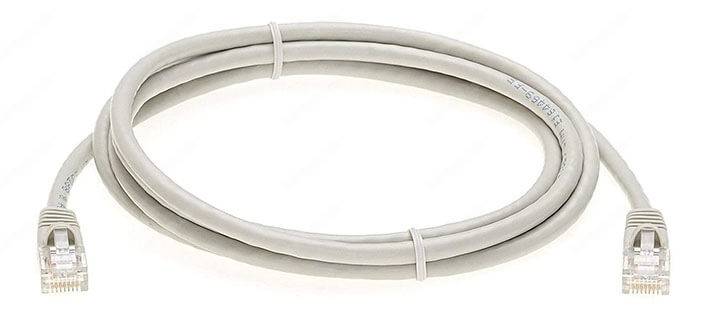
You just need to use a UTP cable to connect the camera to the router.
In dummy terms, the UTP cable is known as network cable or computer cable.
Just connect the cable to your computer or laptop and the router.
If you want to connect the IP camera to a laptop without Internet, just ignore the router and connect the UTP cable as shown in the picture below.
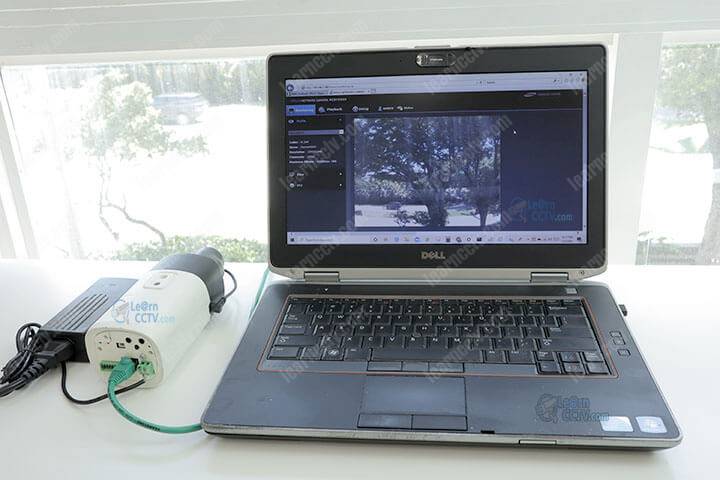
Now that the devices are physically connected, you have two options:
- Let the IP camera and laptop get the IP address from the router
- Set up the IP address for the camera and laptop manually
If you are using the laptop directly connected to the IP camera you must use the second option and set up the IP address manually.
Even if you consider yourself a dummy, it's not that hard. Let's do it.
Set up the computer and camera IP address
After connecting all the cables just follow the steps to set up the IP address:
Add an IP address to the laptop/computer
1. Open the network configuration;
2. Double click the icon that represents the laptop network card (Ethernet);
3. Click "Change adapter options";
4. Right-click the "Ethernet" icon and click "Properties";
5. Double click the "Internet Protocol version 4 (TCP/IPv4)";
7. Add the IP address and subnet mask and click "Add";
For this example, the laptop/computer IP address is 192.168.2.160 and the subnet mask is 255.255.255.0.
See below the sequence of pictures that illustrate this process...
Click the "Network Icon" close to the windows clock and choose "Open Network & Internet Settings" or just look for this option in the Windows Control Panel.
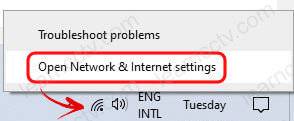
Click the icon to open the Network Settings

Click on Ethernet (or interface that represents your network)
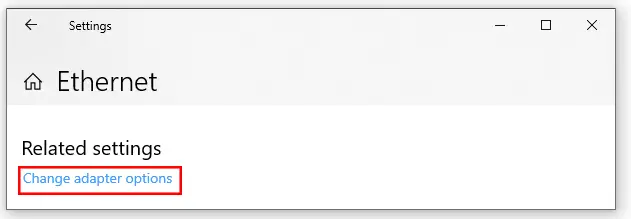
Click on Change adapter options
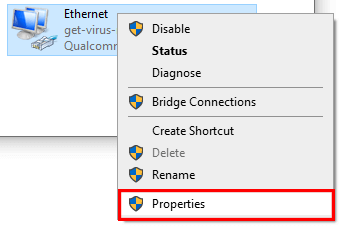
Right-click on "Ethernet "and click "Properties"
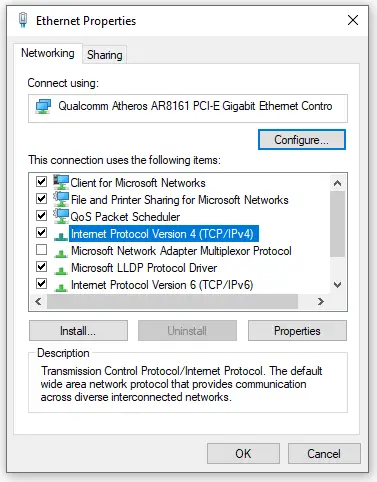
Double click the "Internet Protocol Version 4"

And it's done. Now you have the IP address on your laptop/computer.
Now you can do the same with your IP camera....
(I'm assuming you are using the manual configuration).
Add an IP address to the security camera
OK, now it's time to add the IP address to the camera.
Open a web browser and type the camera default IP address.
The default IP address depends on the camera model and you can find it in the user's manual. Below an example of a Zozi IP camera.

Enter the username and password to login to the camera.
The information is also in the manual, in this case, they are admin/admin.
You will be able to see the live video stream from the camera (as shown below).
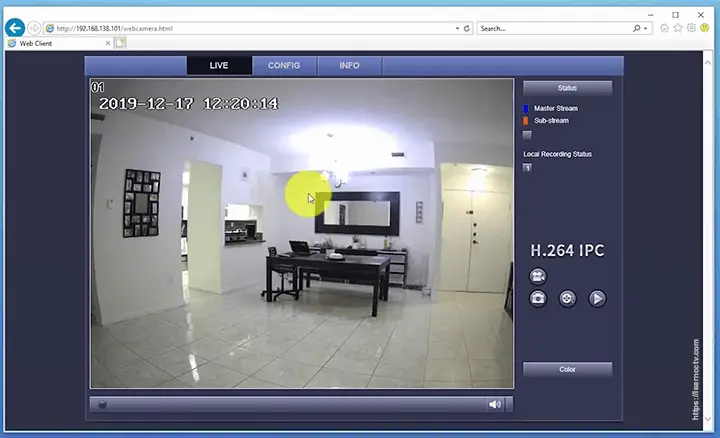
Look for a "Setup button" or "Config button" and then look for the "Network" menu to change the default IP address.
Change the IP address, Port, Subnet mask, and Preferred DNS Servers.

Here's an example of the setup of this network.
HTTP Port: | 80 |
Server Port: | 8000 |
IP Address: | 192.168.2.101 |
Subnet Mask: | 255.255.255.0 |
Gateway: | 192.168.2.1 |
Preferred DNS: | 4.2.2.2 |
Alternate DNS: | 8.8.8.8 |
- HTTP port is used for web browser access.
- Server port is used to have access to the camera via software.
- The IP address is the new one, so the camera will be on the same IP range.
-Subnet mask is used to determine how big is the network (you can use this one).
-Gateway is the IP used by the router (set this according to your network).
-Preferred DNS is used to allow your camera to access the Internet.
-Alternate DNS is used just in case the Preferred DNS is down.
For the first access to the IP camera, you need to have your laptop in the same network IP range. Let's say the default camera IP is 192.168.200.1, you can set up your PC/laptop to 192.168.200.2 to have access to the camera.
The Preferred DNS is the IP address of a server located in the Berkeley University and the Alternate DNS from Google, so you can trust them.
Video: IP camera setup
Here's a video IP camera setup for dummies, just watch it to learn more...
Extra information
If you need more information about basic IP camera setup, read the articles:
Want to learn more ?
If you want to become a professional CCTV installer or designer, take a look at the material available in the blog. Just click the links below:
Please share this information with your friends...
