In this article, I explain how the Axis I/O ports work.
Yeah, today is Saturday, and I decided to play with the camera in my lab 🙂
You are the lucky person that will learn some cool stuff here. Just keep reading.
The camera physical I/O ports
Do you know that you can use physical and virtual I/O ports in the Axis cameras?
Here I talk about the physical ports, and later (in another article), I will let you know how the virtual I/O ports work. Sound like a plan? Let's keep moving...
The picture below shows the Axis 233M Camera's I/Os.
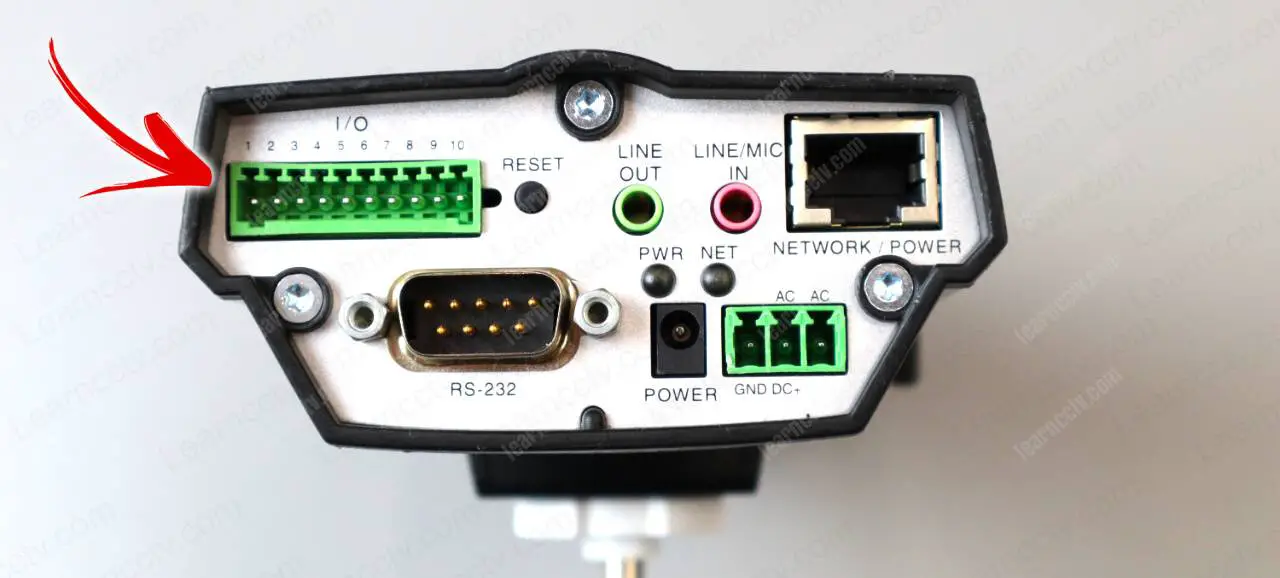
You can use the input ports to connect sensors, push buttons, PIRs, etc.
It's also to use them as output ports to trigger a siren, alarms and other systems.
The number of I/O depends on the camera models.
As you can see in the following picture, the Axis P1365 MK II has 4 physical I/Os.
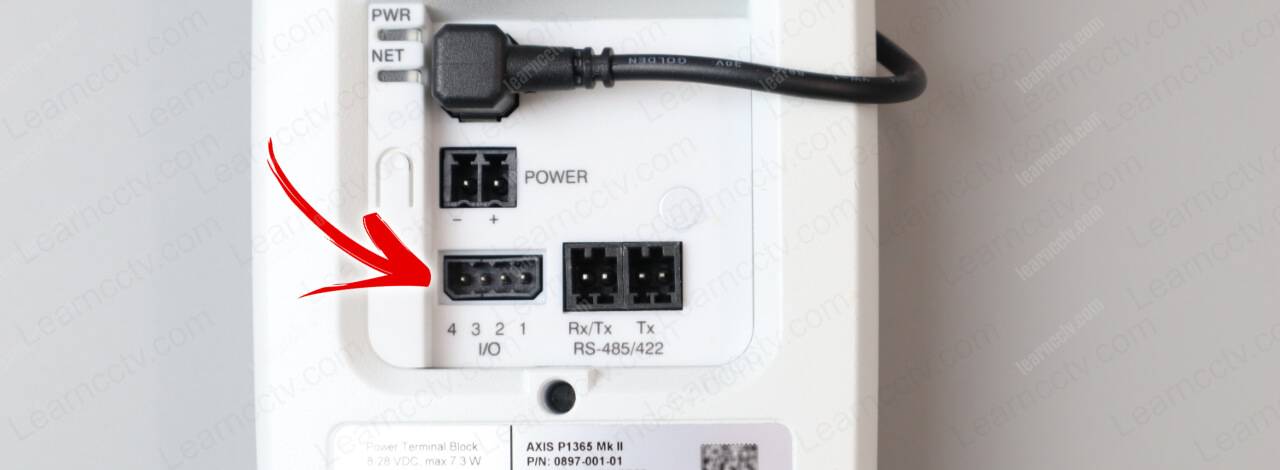
The interesting part is that these I/O ports are not static. (at least for this model).
You can change the port configuration according to your needs
Let's talk more about that....
Axis camera I/O ports configuration
OK, let's look at the 4-pin terminal block details for the Axis P1365 MK II.
Here's a table that shows how the pins work.
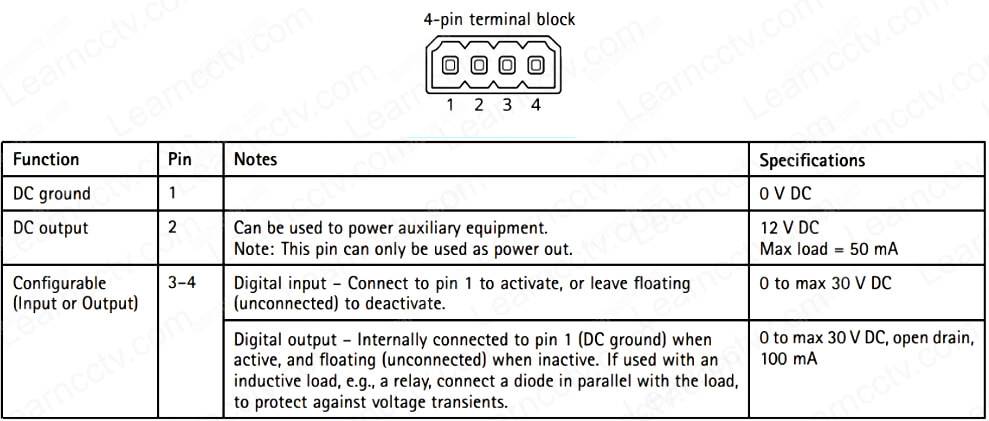
As you can see, PINs 1 and 2 work with 0 and 12 VDC, respectively.
Static PINs
They are NOT configurable. So you can only use them as they are.
The following picture shows an example of a LED connected to PINs 1 and 2.
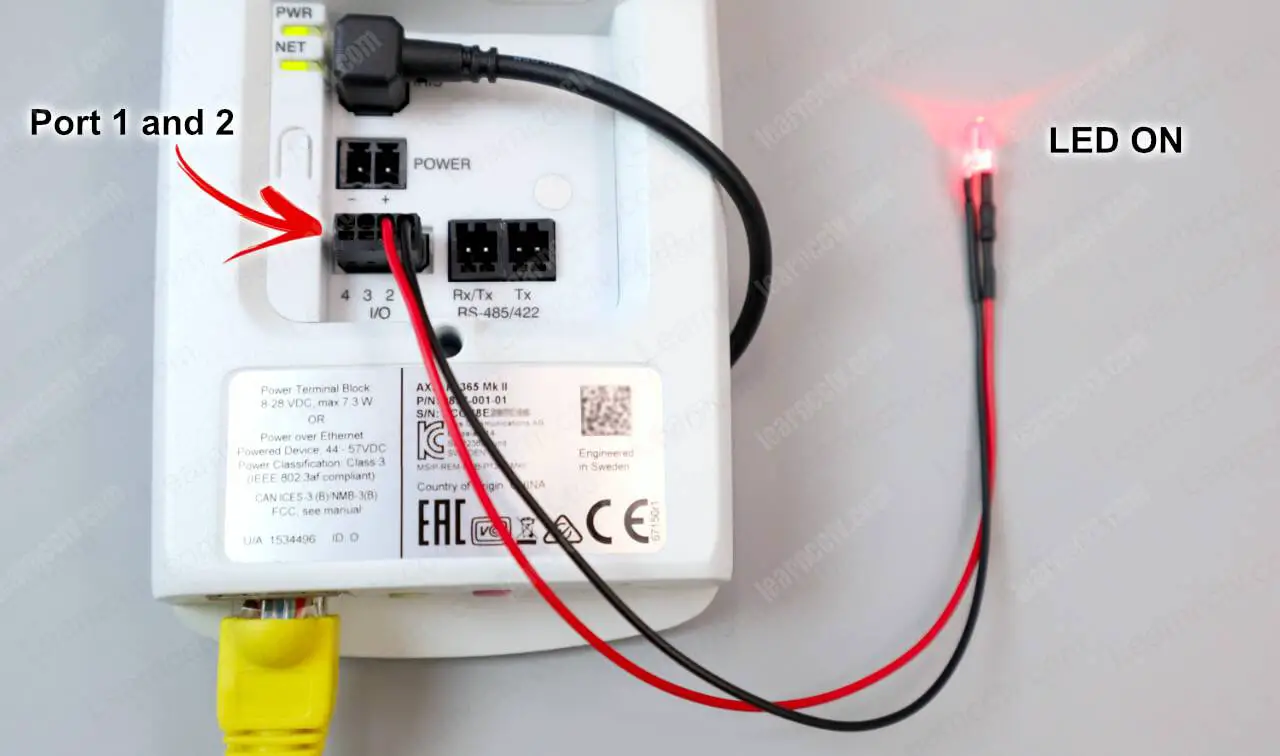
The LED is lit because it received 12 VDC from the PINs.
There's not much you can do here. It's ON, and that's it.
You could connect some external device to these PINs as long as the maximum load (current) is 50mA. However, you have no control and can't turn the device off.
This is boring, right? Don't you want to have more control over the I/Os?
It's time to talk about that.
Configurable PINs
Did you know that "configurable" is a word?
I think it is.... so, let's use it. 🙂
In the camera web interface, there's a menu to change the way the PINs work.
You can change the ports to work as:
- Input
- Output
- Open Circuit (NO)
- Closed Circuit (NC)
It's also possible to enable a "Live View Control" to show a button in the camera's web interface so that you can toggle the Port ON and OFF. Pretty cool, huh?
See the picture below for more details...
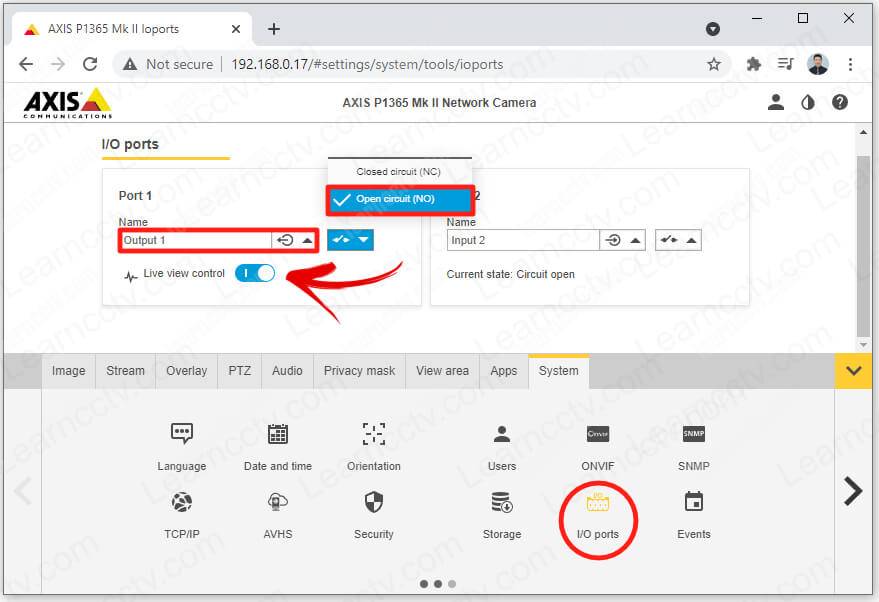
The options vary according to the camera model and firmware version.
After changing the port, a toggle button becomes available in the main window.
Now you can control output 1 and turn things ON and OFF.

So much interesting, isn't it ?
To make things more interesting so that you can learn better, I connected an LED to PINs 2 and 3 on my P1365 MK II camera. Now I can play with this thing 🙂
See how the LED is OFF at first ?
That's because I didn't toggle the button to turn the Output 1 yet...
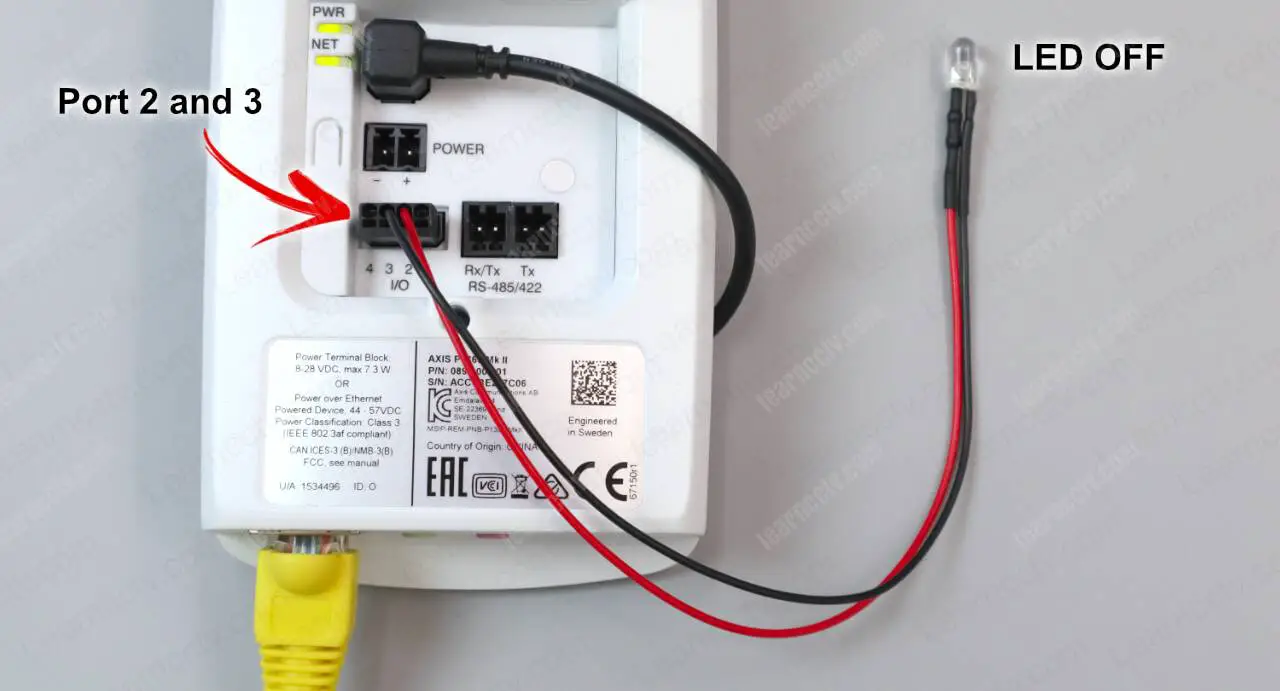
And then, I toggle the button and the magic happens...
Take a look at the picture below.
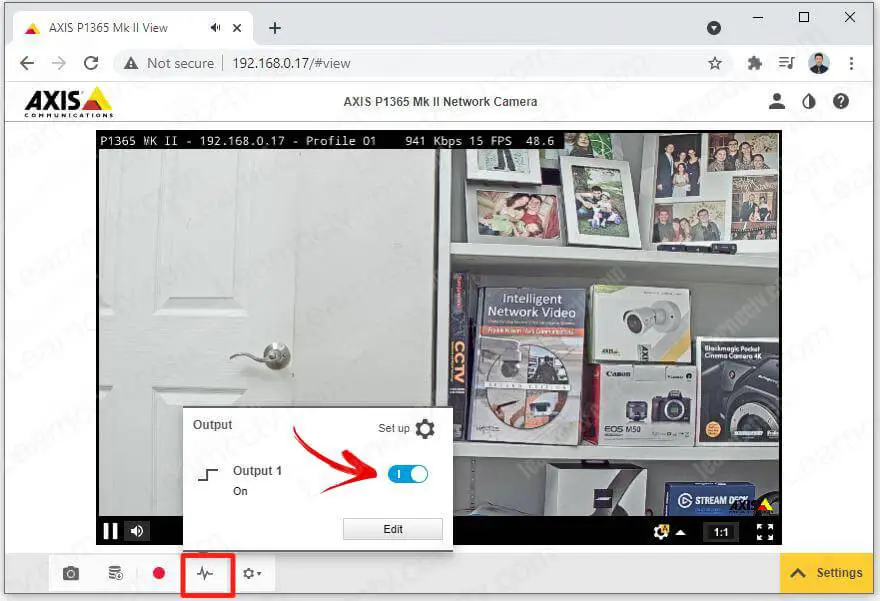
Yeah, I have total control over Output 1.
Since the camera is powered and PIN 2 is "hot," the LED turns ON as soon I toggle the button. Yeah, I know, it could do something more useful, but you got the point.
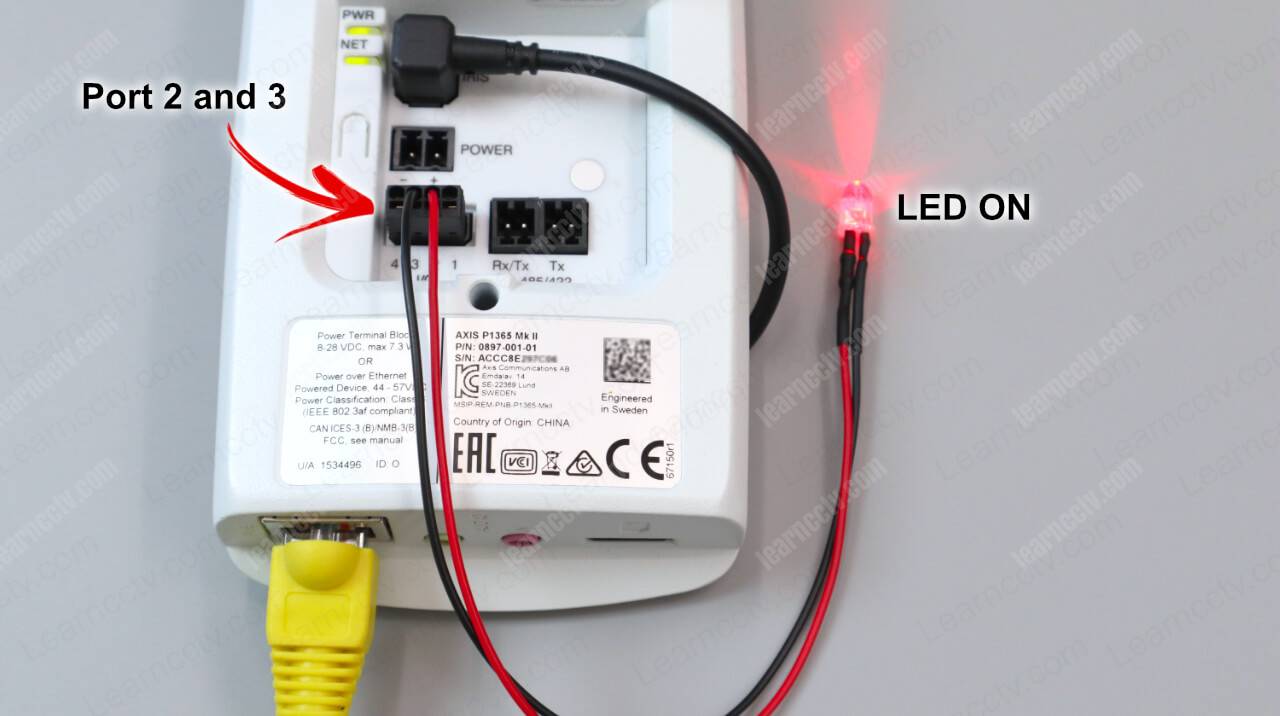
And now it's up to you to use your imagination and new skills to use the I/Os.
It's possible to do many different things since you can make a combination of the I/Os and also use the events to trigger the Input and Output.
Didn't I tell you that ? 🙂
I/O ports and events
Yeah, you don't need to toggle the buttons manually.
You use events to accomplish a lot of different tasks.
Let's say you want to open a door when the camera detects motion or perhaps turn a siren when somebody approaches a PIR sensor.... Yes, you can do that.
It's even possible to create an interaction between different cameras.
Camera 1 detects somebody via a PIR sensor, and camera 2 reacts by using a preset to move the lens and zoom in to a specific position.
I will discuss how to use events in another article.
Virtual I/Os and VAPIX
You can also use Virtual I/O and the AXIS API (VAPIX).
There are a vast number of things that can be done via the VAPIX protocol.
This topic deserves another article, though.
Video: How to Use Axis I/O ports
Here's a quick video on how to use the I/O ports.
Conclusion
Axis cameras have a powerful I/O system.
You can change the way the ports work and also interact with them via VAPIX.
I hope this article can help you; please share it with your friends.
