In this article, I will talk about Hikvision DVR network setup.
After installing your DVR and cameras, it's important to work on the setup to have access via the network, and the first step is to configure the DVR with the basic information such as IP, Mask, DDNS and Gateway.
Important
I want to make sure you are reading the correct article. I will NOT talk about DVR remote access via the Internet. If you are looking for this information, please read my other article: How to access Hikvision DVR from mobile.
But if you need BASIC information on how to setup Hikvision DVR with static IP (which comes before the remote access configuration) you are at the right place.
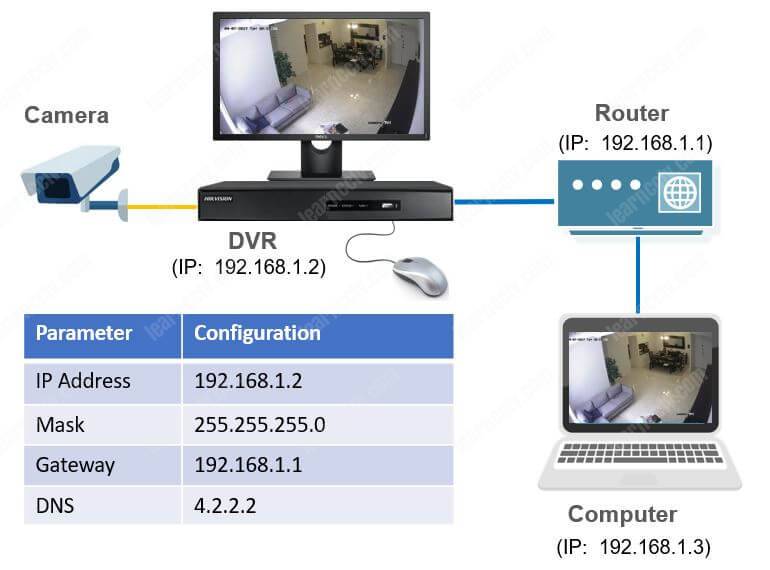
Take a look at the network diagram below, you can see a Hikvision DVR connected to a router and to a laptop. The blue cables represent the UTP cables connecting the devices in the local network.
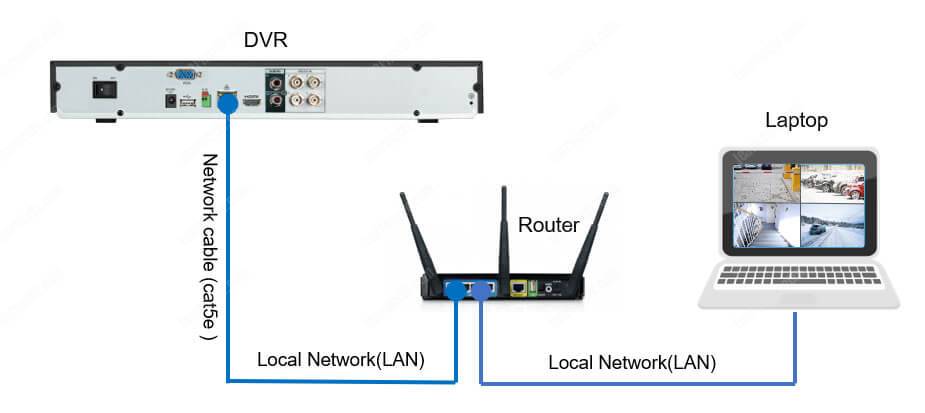
After the correct network setup, you will be able to see the cameras from the laptop as shown in the diagram (assuming the cameras are connected to the DVR).
Follow the instruction below to setup your Hikvision DVR:
Hikvision DVR Network Setup (step-by-step)
1. Connect a monitor and a mouse to the Hikvision DVR
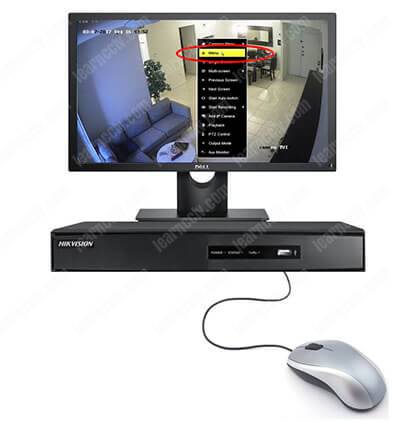
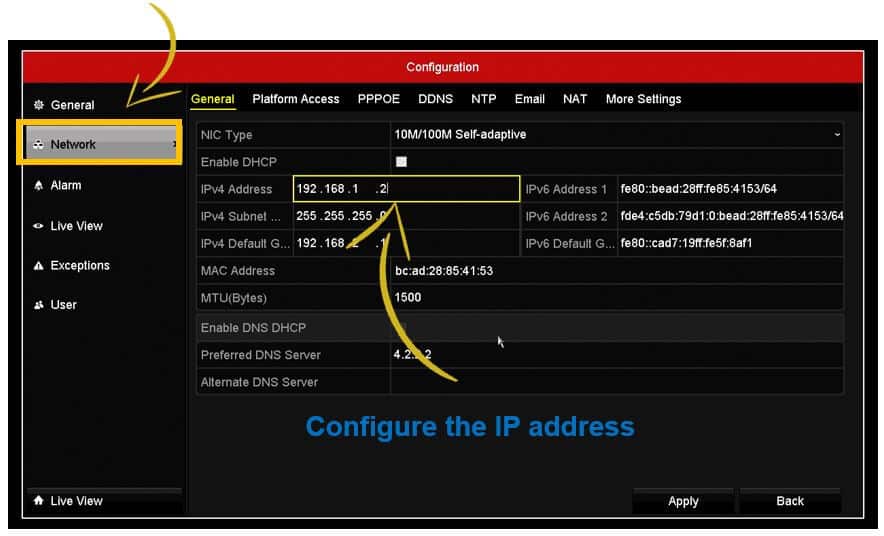
2. Open the DVR Main Menu
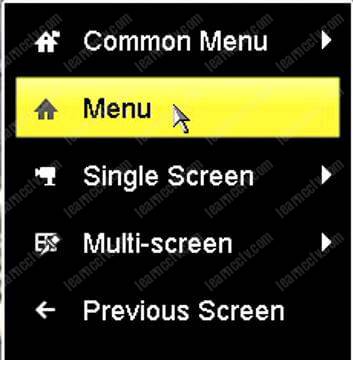
3. Click on Configuration
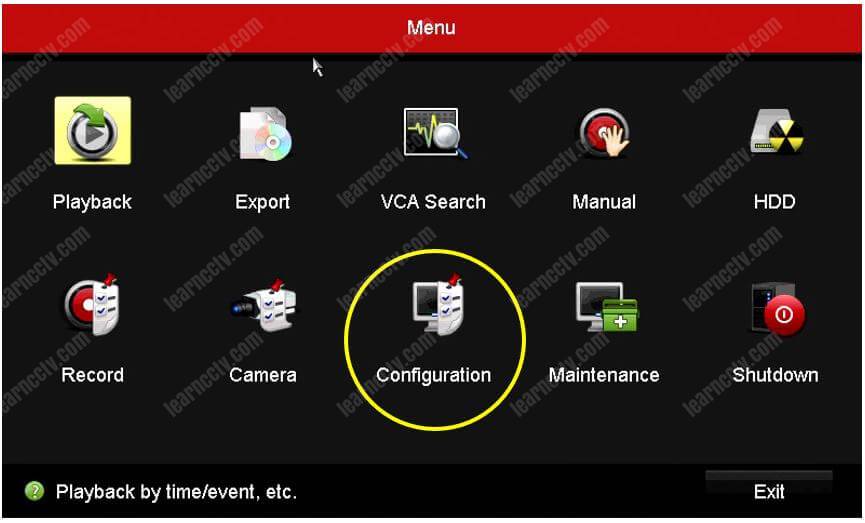
4. Configure the IP, Subnet Mask and Gateway
5. Open a Web Browser and insert the DVR IP
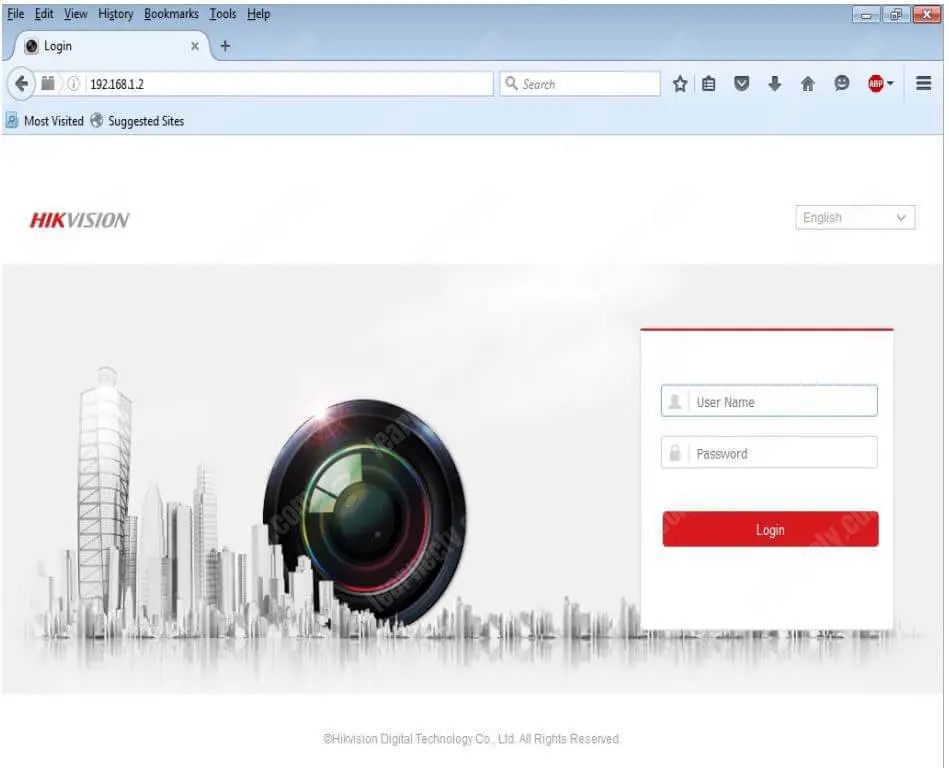
After following those steps you will be able to have local access to the cameras that are connected to the DVR, you just need to make sure your laptop is physically connected to the network as shown in the first diagram and its IP is inside the network IP range. See the next diagram for more details...
Information for the DVR Network Setup
In the diagram below you can see the information you can use for the DVR Network setup. This is just an example of the IPs you can use for each device.
Note that the 192.168.1.x network is being used
And that's all. With these simple steps, you can have your Hikvision up and running in the local network. If you need more information on how to configure the DVR for remote access via Internet, just take a look at the Ultimate Security Camera Guide Volume 2 which has details instructions for DVR Remote Access setup.
Please share this information with your friends...