Do you have a generic H.264 DVR and want free software (CMS H264) for monitoring? If this is your problem, this article is the solution. Here you will find a universal CMS DVR software that works with most DVRs.
I will talk about the operation of the H264 CMS software, teach how you should do the setup for DVRs, NVRs, and IP cameras.
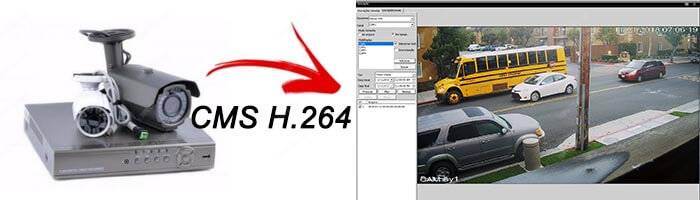
You will also have the opportunity to download the software for free.
This article is very useful to solve the problem for a lot of people that just like you are also looking for a universal CMS DVR software, so please click the buttons below and share with your friends.
What is the Universal CMS DVR software?
To view live and recorded videos from your DVR or IP camera through your computer, you need to use a CMS (Central Monitoring System) software.
The universal CMS DVR software is used for monitoring mixed brands of DVRs, it's usually used by people who have H.264 network DVRs,
There are many DVRs manufactured in China that do not have a brand and often do not even have manual or monitoring software, that's the reason why people start looking for alternative software for non-branded DVRs such as a universal CMS DVR software.
Using the universal CMS DVR software for local monitoring
Let's start with a diagram that shows the installation of a DVR on the local network. In this case, it is necessary to configure it using internal IP.
The DVR must be installed with the security cameras and connected to the router and to the computer with the universal CMS DVR software.

In this diagram, I am using as an example an OEM DVR from Hikvision with TVI technology. For other types of DVRs, the concept is the same.
Make sure that your system is connected as shown in the diagram and check if the images are appearing on the local monitor before continuing.
DVR IP configuration
Before configuring the universal CMS DVR software make sure that the DVR network configuration (IP and port) is correct, Check also the local computer.
See in the example below the network configuration for the Hikvision DVR, the IP is 192.168.2.135 the computer is using IP 192.168.2.192 and therefore they are within the same range of network IPs (192.168.1.1 to 192.168.2.254)

Make sure that DVR is using the correct IP within your network, it doesn't matter if you are using another brand such as Dahua, Swann, etc. The IP configuration principle is the same. So ,find the IP Menu on the DVR.
Obviously, for your particular case, the IPs will be different from the example above, the important thing is that DVR and computer are configured in the same IP network range.
DVR port configuration
I'm talking about DVR logic ports. On the configuration menu, you will find names like HTTP, RTSP, Server port or HTTPS port.
Note that different brands of DVR can bring other nomenclatures, the important thing is to find the correct port for the application. If you don't what are the ports for your DVR, read the manual or talk to the DVR dealer.
The image below shows the DVR using port 8000. Other DVRs bring port 37777 by default. Just check the menu to make sure what is the port.
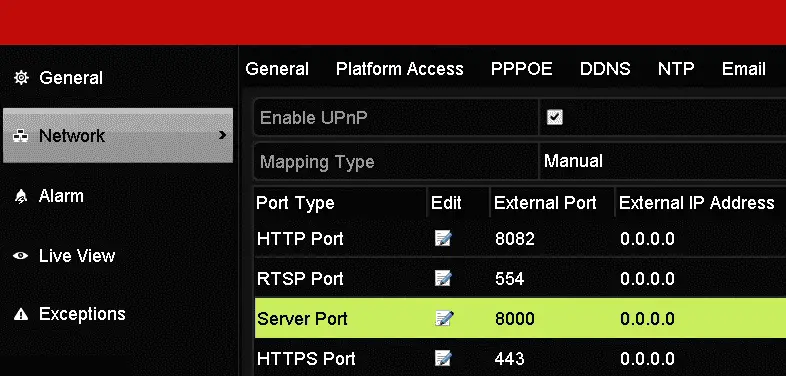
Just write down the ports your DVR is using, just in case you need the information later to configure remote viewing.
Check the local viewing before proceeding
Before setup, the DVR for the H264 CMS viewing it is important to make sure everything is working properly between the DVR and the computer. Use a web browser to check if the local viewing is working fine.

By viewing the DVR images using the browser, you are making sure that the IP configuration is correct and the network is working before the installation and configuration of the H264 CMS. This step is pretty important.
Download the universal CMS DVR software
You will not find an official website with links to the universal CMS DVR software so I have it available right here. Just click the link below:
Remember again that it is not easy to find this universal CMS DVR software available in the latest version, so do not forget to share the information with friends. Click the buttons below:
CMS H264 software installation
The universal CMS H264 software installation is extremely simple, just click on the icon and follow the step by step, by clicking "Next". At the end of the installation process choose the language you prefer to use.
See the images below (click to enlarge)
Choose "English" and click "Next"
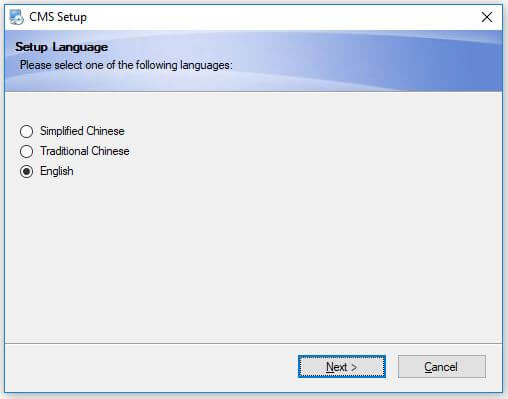
Click "Next"

Click "Next"

Click "Next"

Click "Next"

Choose the language and click "OK"

Universal CMS DVR software features
Live Monitoring
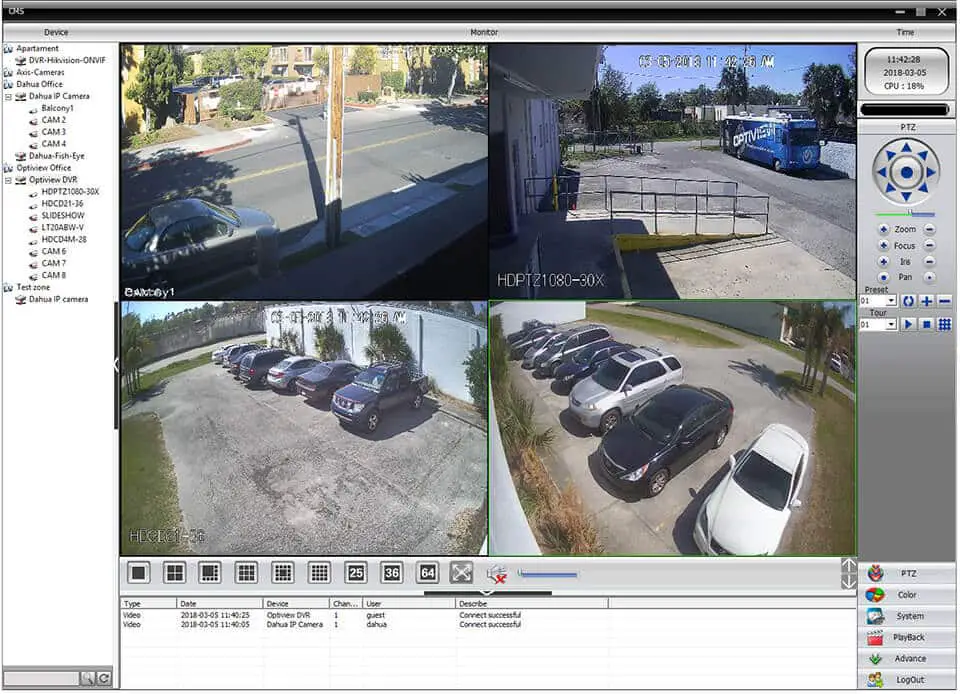
The software main screen shows a sidebar on the left side where a tree appears with the icons for the DVRs, NVRs and, IP cameras. You can click on these icons and drag them to the center of the screen to view the images.
At the center, the software shows all the cameras, at the bottom, there is a toolbar with log information such as date, channels, cameras, and users.
The right side menu shows the date, time, CPU usage, PTZ control and a menu for settings, configuration. and log out.
See below the universal CMS DVR software main screen (click to enlarge)
Device Menu

On the left side menu, you can organize the devices in groups. In this example, I separated everything by location and created the groups: "Apartment", "Dahua Office" and Optiview Office "where each of the devices is located.
In each group, there are DVRs, NVRs or IP cameras that can be connected by the standard protocol or the ONVIF universal protocol.
ONVIF is a universal protocol for electronic security devices. To learn more, just read the article: How does the ONVIF work.
Setting Menu

In the right side menu, you can control PTZ cameras, adjust the picture with brightness, contrast, hue, and saturation, configure the system, use the playback menu and advanced settings.
Each of the buttons will open a menu that shows the options available for each case. The last button is used only to exit the system (logout).
Configuration Menu

In this menu located at the top right of the CMS H264 software you can check the date and time and to the percentage of CPU processing.
When the system is recording, it is also possible to note the percentage of disk usage information.
The device manager menu allows you to add DVRs, NVRs, and IP cameras to the system.
In the local settings menu, you can configure the general settings for recordings, alarms, and DDNS
The remote settings menu allows you to access device features
You can still configure users and check logs
Layout control menu and general information
The center menu allows you to choose the image layout that will be displayed on the screen, with options for 1, 4, 8, 9, 13, 16, 25, 36, 64 cameras and full screen.
When audio is enabled and configured on the device, you can open the channel to play it. Just click the icon to increase the volume.

The bottom part of the menu shows the date, equipment, channels, connected users and the status of each device.